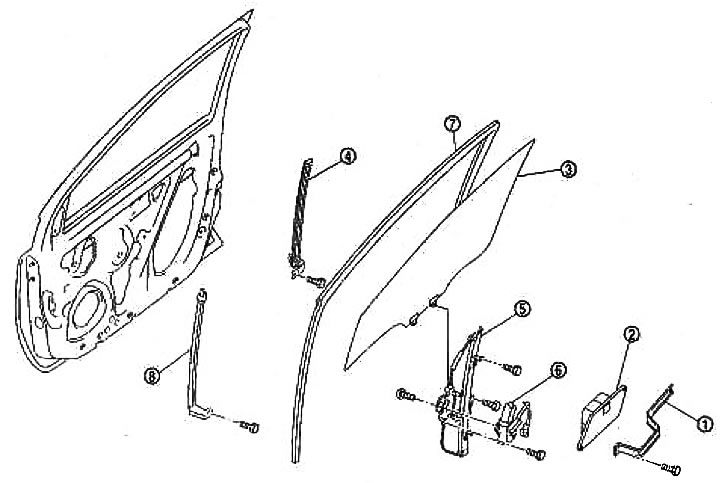
1. door handle bracket; 2. Inner lining; 3. Door glass; 4. Bottom guide (rear); 5. Power window assembly; 6. Power window motor; 7. Guide channel for door glass; 8. Bottom guide (anterior)
Door glass
Removing
1. Remove the front door trim. See section «Exterior finish».
2. Remove the door handle bracket.
3. Fully raise the door glass.
4. Disconnect a socket from the loudspeaker in a forward door and remove a condensing grid.
Note: If reusing the sealing mesh, cut the butyl tape with a knife so that it remains on the sealing mesh.
5. Unhook the clips and remove the inner gasket.
6. While supporting the door glass, lower or raise it with the power window switch until the window mounting bolts are visible.
7. Turn off fixing bolts of glass.
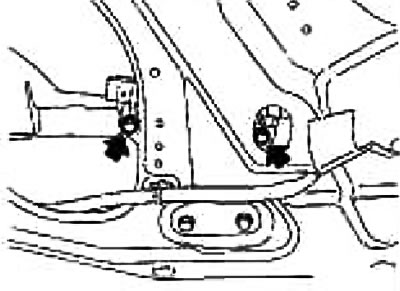
8. Grasp the door glass, lift the rear edge and remove the glass from the guide towards the inside.
9. Remove the bottom rail (back).
10. Remove the door glass guide channel.
11. Remove the bottom guide (anterior).
Installation
Installation is carried out in the reverse order of removal.
Power window assembly
Removing
1. Remove the front door trim. See section below «Exterior finish».
2. Remove the door handle bracket.
3. Disconnect the connector from the speaker in the front door and remove the sealing mesh.
Note: If reusing the sealing mesh, cut the butyl tape with a knife so that it remains on the sealing mesh.
4. Unhook the clips and remove the inner gasket.
5. While supporting the door glass, lower or raise it with the power window switch until the window mounting bolts are visible.
6. Turn off fixing bolts of glass.
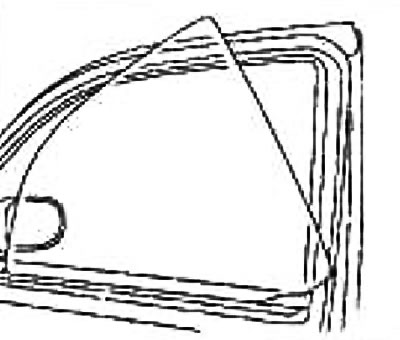
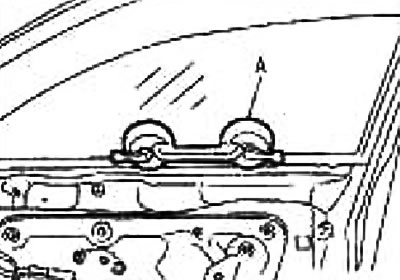
7. Raise the door glass and fix it with suction cup A.
8. Turn off fixing bolts of the engine of a window regulator.
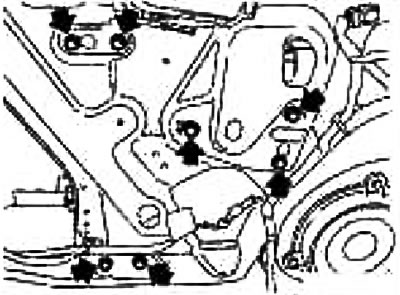
9. Disconnect the connector from the power window motor and remove the power window assembly.
Installation
Installation is carried out in the reverse order of removal.
Check after removal
Check the power window assembly as indicated below. If abnormalities are found, replace or apply lubricant.
Check:
- is the cable worn out;
- whether the window regulator is deformed;
- the state of lubrication in the sliding areas.
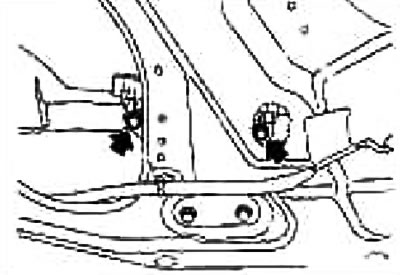
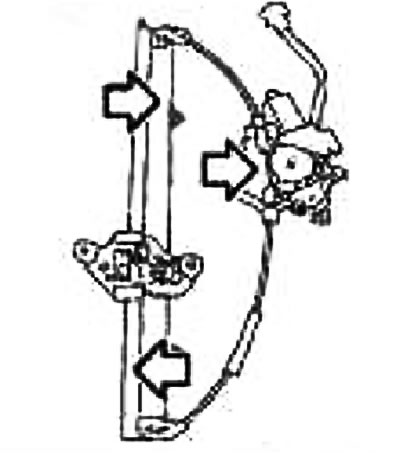
Lubrication points (Nissan MP Special Grease No 2) shown in the figure by arrows.
Check after installation
Resetting the system
In the case of carrying out the work indicated below, reset the system:
- interruption in the power supply to the power window switch or motor due to a blown fuse or disconnection from the battery, etc.;
- removal and installation of the power window;
- removal and installation of the power window motor;
- removal and installation of the power window switch connector;
- replacement of window regulators in a set;
- removal and installation of door glass;
- Removal and installation of the glass guide chute
The reset procedure.
After installing all components on the vehicle, perform the following operations:
1. Temporarily disconnect the cable from the negative battery terminal or disconnect the connector from the power window switch for at least 1 minute, then reconnect.
2. Turn the ignition key to position «ON».
3. Press the button «Down» (down) on the driver's side and hold until the door glass drops to the lower position.
4. Release the button «Down».
5. Pull back the button «Up» (up) from the driver's side (to the second «clicks») and hold until the door glass rises to the top position and another 5 seconds (this is necessary so that the entire operation can be carried out with one continuous push of the button «Up»).
6. Release the button «Up».
7. Check the pinch prevention function.
Checking the operation of the anti-pinch system
1. Fully lower the door glass.
2. Put a wooden block (wooden hammer handle, etc.) in an almost raised position.
3. Fully raise the glass in automatic mode.
Make sure the glass changes direction without pinching the wood block, lowers approx. 150 mm or within 2 seconds and then stops.
The window must not rise when the main power window switch is pressed during a change of direction or lowering.
Attention:
- Do not test by pinching any part of the body, hand, etc. Try to avoid pinching.
- Make sure the auto-lift function works normally before checking after resetting the system.
Fit check
Make sure the glass fits snugly into the groove of the guide chute.
Lower the glass slightly (approx 10-20 mm) and make sure the edge of the glass is parallel to the guide. If not, loosen the fixing bolts for the power window, glass and carrier and adjust the position of the glass.