Checking the radiator cap
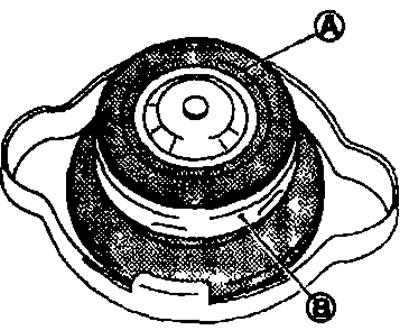
- Check the radiator cap valve seat.

A. Valve seat; B. Metal plunger.
- Check that the valve seat is not swollen to such an extent that the edge of the plunger is not visible when viewed vertically from above.
- Make sure that the valve seat is free of dirt and damage.
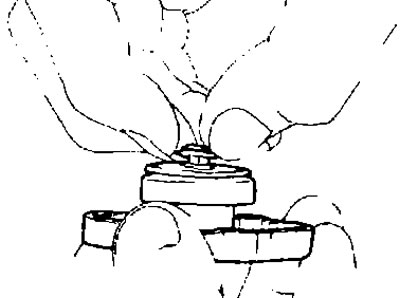
- Pull the vacuum valve, open it, and make sure it closes completely when released.
- Check that the radiator cap vacuum valve seat is free of dirt and damage.
- Make sure that there is no abnormality when opening and closing the vacuum valve.

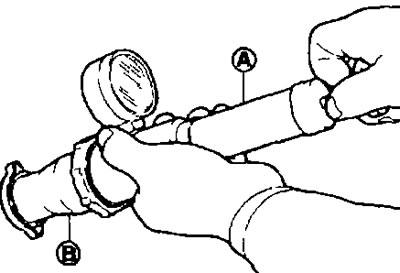
- Check the radiator cap release pressure.
Standard and limit. See paragraph below. «Technical data and specifications».
When connecting the radiator cap to the pump (suitable special tools) (A) and adapter (special tool) (IN), apply engine coolant to the seal.

- If the vacuum valve shows abnormalities in the above three points, replace the radiator cap.
Attention. Before replacing the radiator cap, thoroughly wipe the radiator filler neck to remove any waxy deposits or foreign particles.
Radiator check
- Check if the radiator is clogged with dirt. If necessary, clean the radiator as follows:
Attention:
- Do not bend or damage the radiator fins.
- When cleaning the radiator without removing it from the vehicle, remove all adjacent parts, coolant fan, radiator shroud and horns. To prevent water ingress, wrap electrical wiring and connectors with protective tape.
1. Water the back of the radiator core with water from a hose vertically downwards.
2. Again, pour water over the entire surface of the radiator core once every minute.
3. Stop watering if dirty water no longer flows from the radiator.
4. Blow air through the radiator core from the reverse side vertically downwards.
- Supply compressed air at a pressure below 490 kPa (5 kg/cm²) and from a distance of more than 30 cm.
5. Blow air again over the entire surface of the radiator core once every minute until no more water flows.