Seats
Front seats
Manual seat adjustment
Longitudinal seat adjustment.
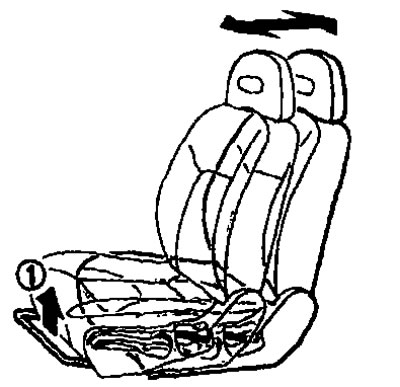
Pull up the lever (1). Move the seat to the desired position. Release the lever to lock the seat in the selected position.
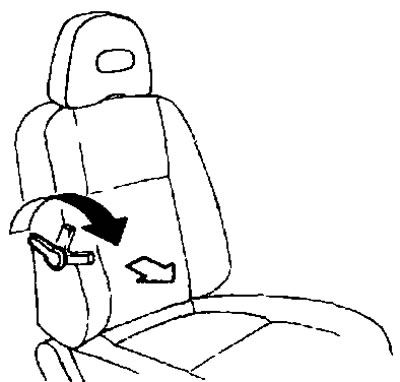
Seat backrest tilt adjustment.

To recline the seat back, pull the lever (2) up and lean back. To return the backrest to its previous position, pull the lever and lean forward. The seat back will move forward. Release the lever to lock the seat in the selected position.
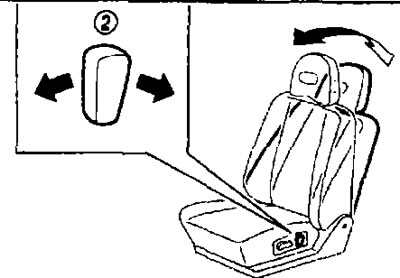
Seat height adjustment (if available).
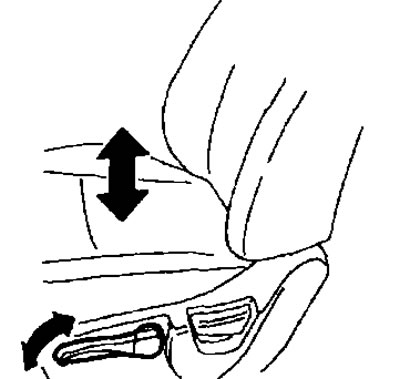
Move the lever up or down to adjust the angle and height of the driver's seat cushion.
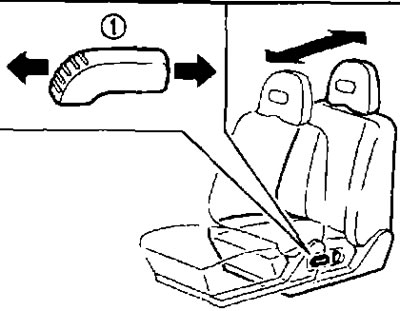
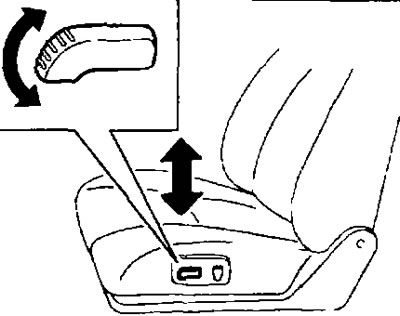
Lumbar support (if available).
Rotate the lever forward or backward to adjust the position of the lumbar support.
The lumbar support provides support for the driver's lower back.
Electric seat adjustment
Recommendations:
- The seat adjustment motor has overload protection. If the motor switches off during adjustment, wait 30 seconds and then press the corresponding switch again.
- To avoid discharging the battery, do not use the seat adjustments for a long time without the engine running.
Longitudinal seat adjustment.
Move the switch (1) forward or backward to adjust the seat to the desired position.
Seat backrest tilt adjustment.
Turn the switch forward or backward to recline the seatback to the desired angle.
Seat height adjustment (if available).
Pull up or push down the switch and hold it until the desired seat cushion height is reached.
Heated seats (if any)
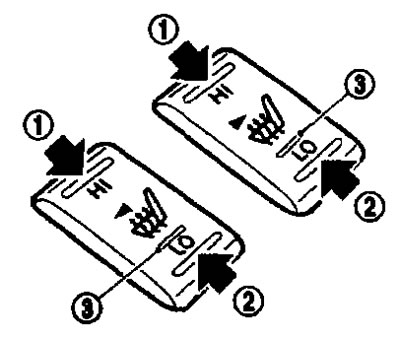
The front seats are heated with built-in heating elements. The switches are located on the center console and can be used independently of each other.
1. Start the engine.
2. Select heating intensity.
- For intense heat, press the top (HI) side of the key (1) the indicator lights up (3).
- For moderate heat, press the bottom (LO) side of the key (2) the indicator lights up (3).
3. To turn off the seat heating, return the button to the horizontal position.
Rear seats
Adjustment
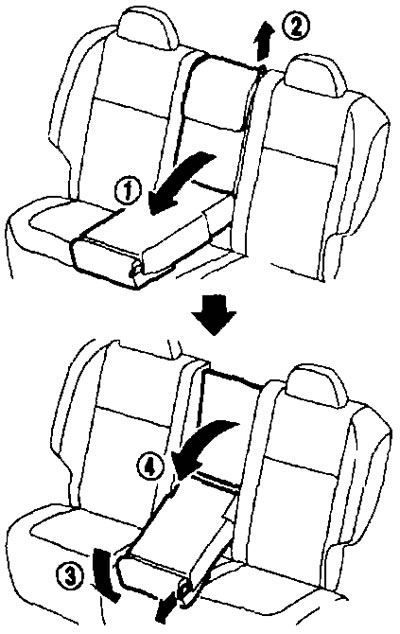
Adjusting the seat backrest angle.
Pull the handle (1) up. Recline the seat back to the desired position. Release the handle (1), to lock the seat in the selected position.
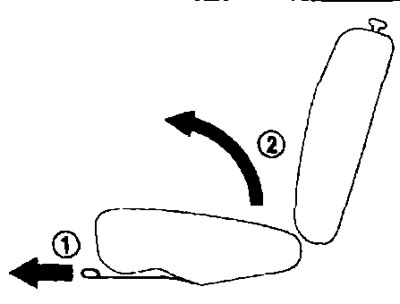
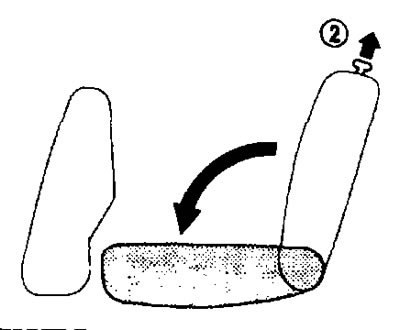
Folding the seat.
Headrests
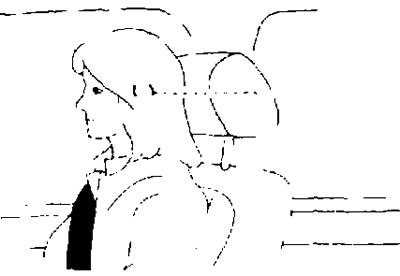
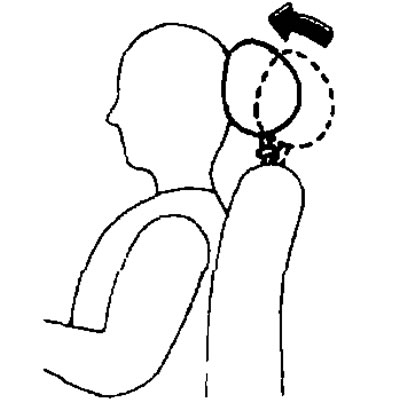
- The correct height adjustment of the headrest is shown in the figure on the next page. p.
- The center of a properly installed headrest should be level with the center of the ears.
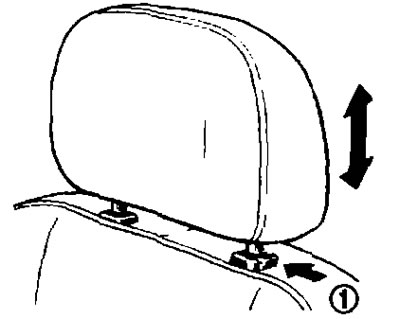
Adjustment (if provided)
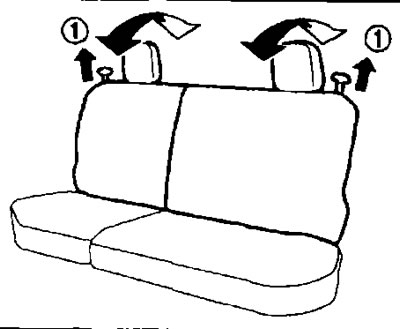
To raise the headrest to the required height, pull it up. To lower it to the desired position, press the release button (1) and press down on the headrest.
- The rear seat head restraints can only be in one of the locking positions corresponding to the recesses on the head restraint pillars. The lowest position of the head restraint corresponds to its folded position.
- To remove the rear headrest when folding the seat, etc., press the release button and pull the headrest up. The removed head restraint must be securely fastened.
Active head restraints (if any)
- When a vehicle collides with a vehicle from behind, the active head restraint moves forward due to the inertial force of the passenger's body, which acts on the seatback. Moving the headrest cushion forward helps reduce the dynamic tilt of the head back and reduces the load on the cervical vertebrae. This reduces the likelihood and severity of neck injury.
- Active head restraints only deploy when the vehicle is struck from behind. Following a rear impact, the active head restraints return to their original position.
Armrests (if any)
Pull the sling (2) and install the armrest (1) to a horizontal position. When the backrest angle is increased, the armrest can be installed lower. To do this, pull the strap and tilt the front part (3) armrest to the required position.
Luggage compartment access
Open the lid (4), located in the center of the seatback to allow access to the luggage compartment or to load luggage.