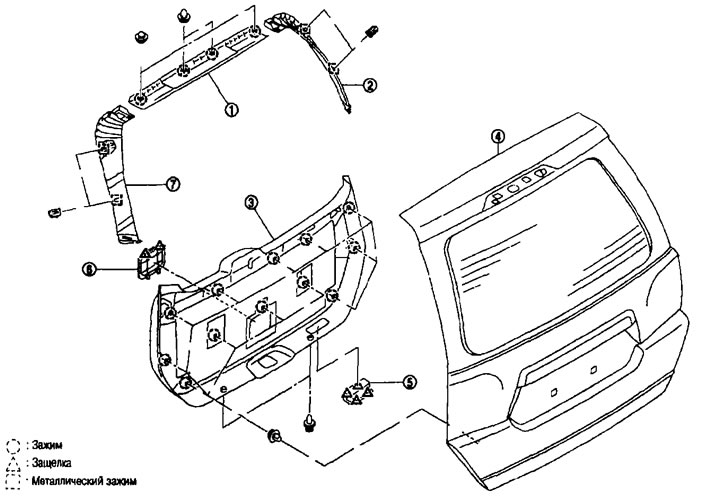
Rear door trim. 1. Rear door interior upper trim; 2. Rear door interior side trim (right); 3. Rear door interior lower trim; 4. Rear door assembly; 5. Handle; 6. Rear door mask; 7. Rear door interior side trim (virgin).
Removal and installation
Removal
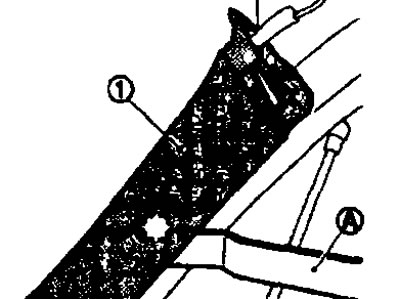
Rear door interior lower trim.
1. Open the rear door completely.
2. Using a puller (A) disengage the handle fastening latches (1).
3. Insert the puller (A) between the inner lower trim of the rear door (1) and the side panel of the body and disengage the clamps.
Note. Start at the bottom and work your way to the edges and then up the sides.
4. Pull the inner lower trim of the rear door toward the vehicle interior and disconnect the connector from the luggage compartment lamp.
5. Remove the rear door interior lower trim.
6. After removing the rear door lower interior trim, remove the following components:
- luggage compartment lamp assembly;
- back door mask.
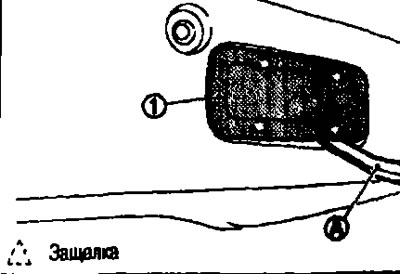
Rear door interior upper trim.
1. Open the rear door completely.
2. Remove the rear door interior lower trim.
3. Insert the puller (A) between the inner upper trim of the rear door (1) and the rear door panel and disengage the clips.
4. Remove the rear door inner top trim.
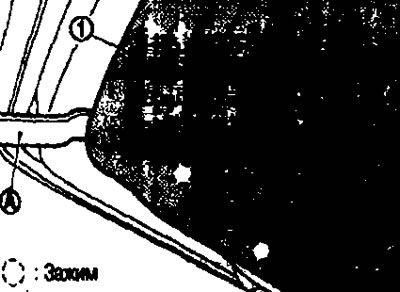
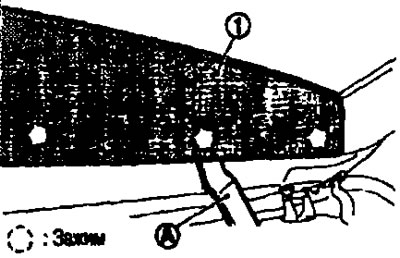
Rear door interior side trim.
1. Open the rear door completely.
2. Remove the rear door interior lower trim.
3. Remove the rear door inner top trim.
4. Insert the puller (A) between the inner side trim of the rear door (1) and the rear door panel and disengage the metal clips.
5. Remove the rear door inner side trim.
Installation
Installation is carried out in the reverse order of removal.
Attention. When installing the rear door trim, check that the clips are seated correctly over the holes in the body side panel, then press them in.