Note: Before starting work, please read the Note at the beginning Chapter 18 regarding the hazards of asbestos dust.
1. The rear brake drums are mounted to the rear hubs. Removal therefore requires dismantling the wheel bearings. When reinstalled, the wheel bearings must be reassembled and adjusted.
2. Remove all remaining brake dust. Where possible, use a clean, dry cloth, but if necessary, use a soft brush. If it is not burnt dust, use an electric vacuum cleaner. Be careful not to inhale brake dust.
3. Check the brake drum for obvious signs of wear or damage, such as cracks around the wheel struts. Replace the drum if necessary.
4. Examine the inside of the drum. Small output is allowed; If the output is very high, the drum must be replaced. Typically, a ridge will form on the inside edge of the drum, which is a mixture of brake dust and rust; this needs to be cleaned thoroughly to leave a smooth surface. Perform final polishing of the surface with fine-grained sandpaper.
5. If you think the drum is excessively worn, the inner diameter should be measured at several points (Pic. 9.22), using a micrometer. Measurements must be taken in pairs, in perpendicular planes. Also check the difference between the inner and outer radius of the test area to ensure that the taper is within normal limits. It may be necessary to grind the drum if the drum diameter allows. This work must be carried out by a specialist.
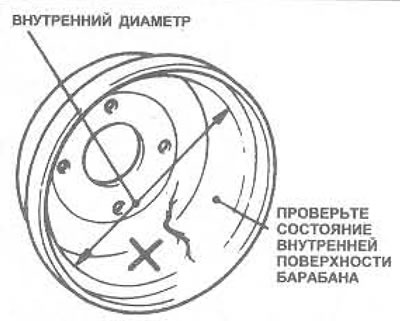
Pic. 9.22. Checking the brake drums
6. If one of the brake drums is worn or damaged enough to warrant rebuilding, both drums must be replaced at the same time to ensure even braking.
7. When assembling a new brake drum, use a suitable solvent to remove the preservative.