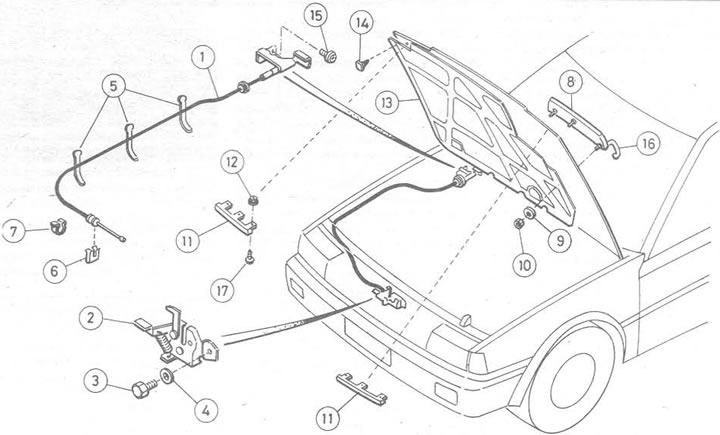
Pic. 11.1. Hood lock and release cable: 1. Release cable; 2. Hood lock; 3. Bolt; 4. Washer; 5. Cable fastenings; 6. Bracket; 7. Bracket; 8. Hood grille; 9. Washer; 10. Nut; 11. Bonnet front trim; 12. Union nut; 13. Insulating gasket; 14. Front pad stop; 15. Screw; 16. Rubber gasket; 17. Screw
1. Open the hood and make a pencil mark around the hood latch, then unscrew the latch bolt from the front body panel. Pull out the bracket and disconnect the cable.
2. Remove the cable from the mounting brackets along its entire length.
3. From inside the vehicle, remove the three screws and remove the driver's side door sill protector. Remove one mounting screw and remove the right side trim panel from the front mounting bracket.
4. Remove the hood release lever mounting screws (see photo) and carefully pull the cable back through the inner fender panel and bulkhead.
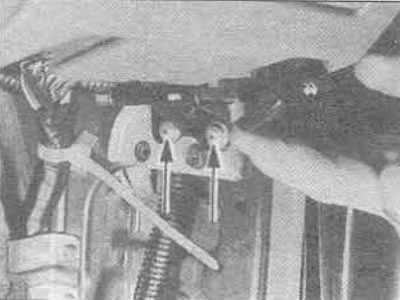
9.4. Hood release lever and mounting screws (shown by arrows)
5. Assembly is carried out in reverse order. Install the lock so that its position matches the marks and make sure that it works correctly.
6. There are no adjustments here, like for the release cable.
7. To adjust the position of the lock during installation, first remove the radiator grille (see Chapter 10 of this Section).
8. Loosen the lock mounting bolts and position it so that the main latch is centered on the hood strike plate when the hood is 1.0-1.5 mm below the level of the fenders. Press the hood support buffers and adjust their position if necessary (see photo). Tighten the lock mounting bolts securely, then recheck the operation of the primary and secondary (security) valve
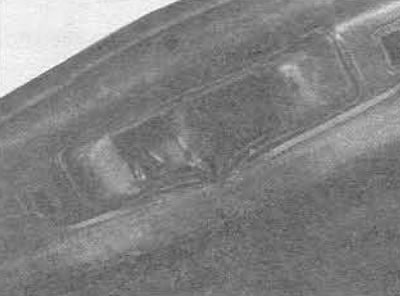
9.8A. Hood lock strike plate
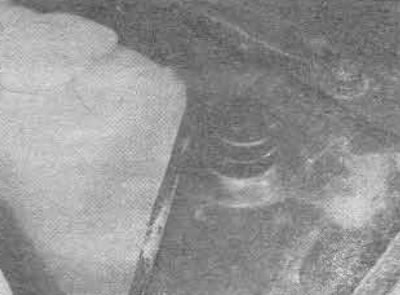
9.8V. Hood support buffers
9. The secondary latch hook must secure the hood projection by at least 5 mm and must be securely secured by a spring.
10. Finally, adjust the support buffers to keep the hood level with the fenders. The free height of the buffer should be approximately 13 mm.
11. Install the radiator grilles and trim panels.