It is recommended to remove the solenoid valve to check the serviceability (see below).
Examination

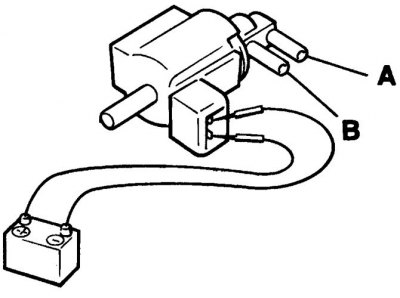
1. When power is applied (12V) Air must flow freely through ports A and B.
2. If the test result is negative, the valve should be replaced.
3. Remove the air ejection valve (see below).

4. When blowing through port B, air must not pass through. If a vacuum is created on the fitting A, then the air must pass from B to C, in the opposite direction (from C to B) air must not pass under any circumstances (A - vacuum hose from the solenoid valve, B - hose from the air filter, C - to the exhaust manifold).
5. If the test result is negative, the valve should be replaced.
Solenoid valve
Replacement
1. The solenoid valve is screwed into the left side of the suction manifold.
2. Disconnect the battery from the mass, disconnect the connector.
3. Mark the order in which all hoses are to be connected.
4. Loosen the clamps and disconnect the hoses.
5. Remove the valve from the bracket.
6. Installation is carried out in the reverse order.
Air ejection valve
Replacement
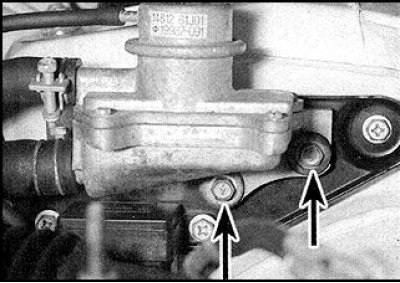
1. The air ejection valve is mounted on the left suspension cap.

2. To replace the valve, disconnect the hoses (indicated by arrows).
3. Turn away bolts and remove the valve.
4. Installation is carried out in the reverse order.
Idle corrector
Examination

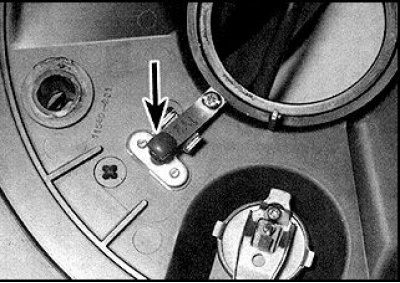
1. Remove the air filter cover. Valve (s) idle correction (indicated by an arrow) mounted on the bottom of the filter housing.
2. Have a thermometer and hair dryer ready. Heat the valve with a hair dryer. The valve must be closed at temperatures below 55°C, open slightly between 55–65°C and open fully at temperatures above 65°C. If 2 valves are provided, then the temperature characteristics of one valve are exactly the same, and the second valve is closed at temperatures below 65°C, opens slightly in the range of 65–75°C and fully opens at temperatures above 75°C. When completely cooled, the valve should close completely.
3. At negative results of check the valve replace.
Correction valve replacement
1. Remove the air filter.
2. Disconnect the hose, unscrew the screws and remove the valve.
3. The valve is installed in reverse order.
Pneumatic shock absorber
Examination
When the air shock absorber rod is pushed in, resistance should be felt, and when released, the rod should quickly return to its original position.
Otherwise, replace the air shock absorber.
Replacement
1. On carbureted engines, unscrew the 2 screws and remove the valve from the carburetor.
2. On injected engines Remove the nut and remove the valve from the throttle body bracket.
3. Install the air spring in reverse order and check the adjustment. On a warm engine, the air shock absorber rod should come into contact with the adjusting screw at 1900±200 rpm. To adjust, unscrew the locknut and set the screw to the desired position at the specified speed, check the adjustment again.