Aluminum Oil Pan Nuts and Bolts Tightening Sequence
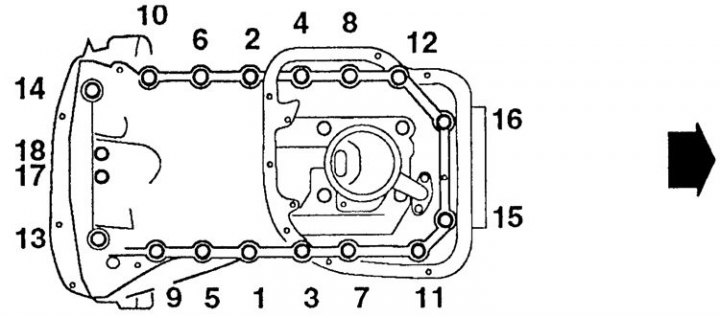
Removing
1. Apply the handbrake to the vehicle, then raise the front of the vehicle and place it on stands. Disconnect the battery from the ground.
2. Turn away screws and remove a plastic casing under the engine.
3. Drain the engine oil. After draining the oil, clean the drain plug, screw in and tighten to the specified torque. If the work is carried out when the oil and filter change is due, it is recommended that the filter be replaced as well. After assembly, fill the engine with fresh oil.
4. Based on the description in subsection 6.1.13, disconnect the muffler downpipe from the exhaust manifold.
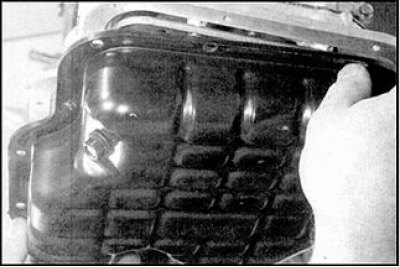
5. In the reverse order shown in Fig. Aluminum Oil Pan Nuts and Bolts Tightening Sequence,remove all bolts securing the stamped steel small pan to the base of the cast aluminum alloy main pan. Use palm strokes to open the small pan seal and remove it from under the vehicle.
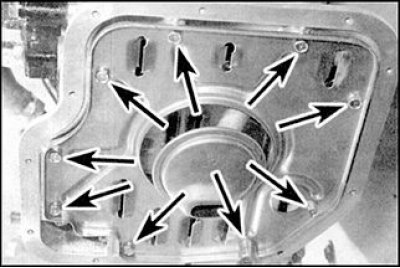 | 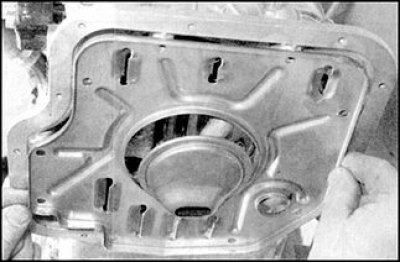 |
6. Loosen the bolts and remove the oil slinger plate from the base of the aluminum pan.
7. Slightly raise the transmission housing with a jack, laying a board so that the jack takes the weight of the unit. You can also hang the engine on a traverse or on a hoist.
8. On manual transmission vehicles, mark the location of the bolt on the front support bracket with a marker. According to these marks, the bolt will be installed during assembly. Release and turn away a nut, then get a coupling bolt of a support.
9. On all vehicles, loosen and unscrew the tie bolt nut and remove the bolt from the power unit rear mount.
10. Loosen and unscrew the four bolts securing the central side member to the body, remove the side member assembly and remove it from under the car. Remove the restrictive ring that is installed between the rear support and the bracket.
11. On vehicles equipped with air conditioning, loosen and remove the A/C compressor bottom bracket bolts to the aluminum pan.
Attention! The compressor itself does not need to be removed.
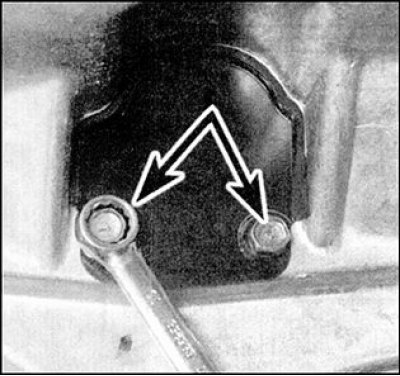
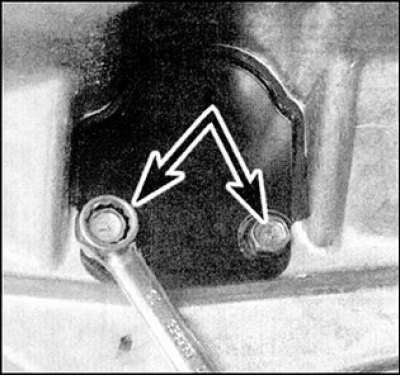
12. Loosen the two pan cover bolts.
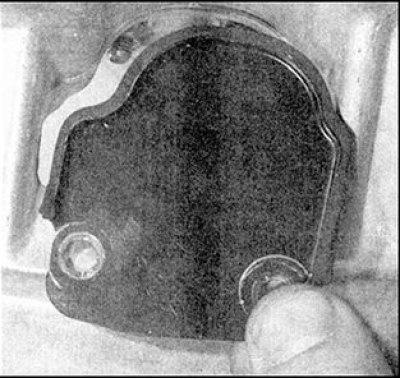 |  |
13. Remove the overlay, after which access to the two nuts of the pallet will be provided.
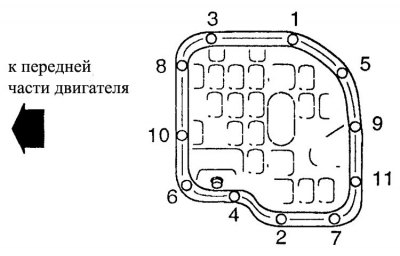
14. In the reverse order shown in the figure, unscrew the nuts and bolts securing the aluminum pan to the base of the cylinder block.
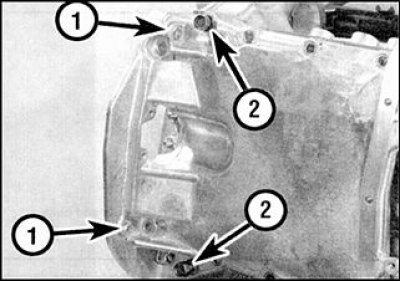
15. Loosen the two fixing screws (1) flange part of the oil pan to the transmission case. These bolts must be screwed into the adjacent threaded holes (2), and use them to remove the oil pan from the cylinder block by screwing. Screw the bolts all the way into the split plane of the cylinder block, then alternately tighten the bolts, gradually increasing the force, thereby ensuring uniform removal of the pan from the base of the cylinder block without distortions.
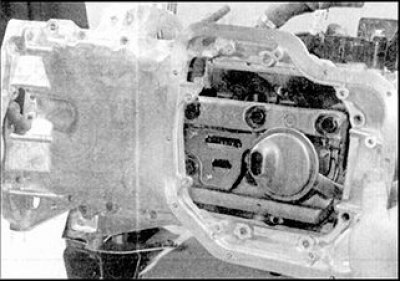
16. Remove the aluminum pallet and turn out the bolts used for separation of the pallet from the block of cylinders.
Attention! On vehicles equipped with an automatic transmission, it may be necessary to disconnect the selector lever cable from the transmission to remove the sump.
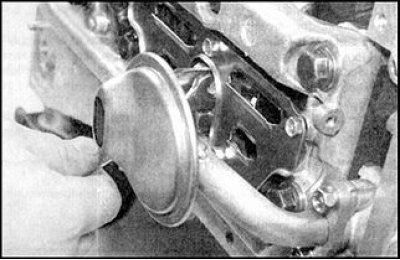 | 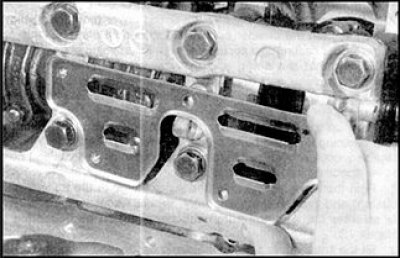 |
17. While the pan is removed, unscrew the two bolts and remove the oil receiver with the coarse filter and the oil deflector plate from the crankshaft main bearing cap frame. Remove the O-ring installed between the oil receiver filter and the timing chain cover. Wash the coarse filter in solvent. Check for blockages or breaks in the oil receiver filter screen. If there are any signs of damage, replace the oil receiver assembly with the coarse filter.
18. Check for signs of damage on the rubber bushings of the central side member, replace the bushings if necessary.
Installation
1. Clean the split planes of both pallets and the cylinder block from the residues of the seal, then wipe clean the pallets and the internal surfaces of the engine.
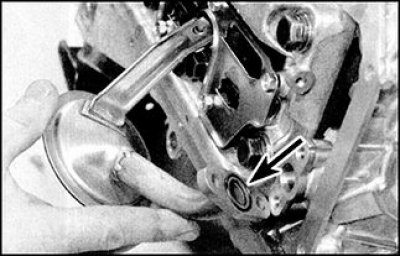
2. Install a new O-ring into the oil receiver groove and install the oil receiver on the base of the chain drive cover. Tighten the oil receiver mounting bolts securely. Install the oil baffle plate on the lugs at the bottom of the crankcase, securely tighten the mounting bolts.
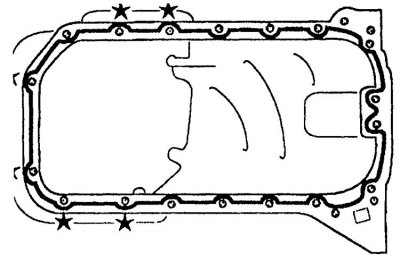
3. Make sure that the split planes of the sump and cylinder block are dry and clean. Apply a continuous bead of sealant to the surface of the aluminum pan to be sealed. keep in mind that around all the bolts marked with an asterisk, the strip should be on the outside, and around the rest of the bolts - on the inside.
4. Attach the pallet in place to the cylinder block. Wrap bolts and nuts, tighten them by hand. Tighten bolts and nuts of the pallet with the set moment, in the sequence specified in fig. Aluminum Oil Pan Nuts and Bolts Tightening Sequence.
5. Install the two bolts securing the sump flange to the transmission case and tighten them securely. Connect the selector lever cable if necessary.
6. Install the cover on the flange part of the pallet, tighten the bolts.
7. On vehicles equipped with air conditioning, securely tighten the compressor bracket mounting bolts.
8. After making sure that all rubber bushings are present, install the restrictive ring on the power unit rear support bracket. Reinstall the center spar, aligning with the engine mounts, tighten the bolts with washers. Tighten the central side member mounting bolts to the specified torque.
9. On vehicles with a manual transmission, install the power unit front mount pinch bolt in place, tighten the nut. Align the power unit so that the front mount pinch bolt is exactly aligned with the mark made before disassembly. Then tighten the bolt to the specified torque.
10. Insert the power unit rear mount pinch bolt and tighten the nut to the specified torque.
11. Remove the jack from under the transmission case.
12. Install the oil baffle plate at the base of the aluminum pan, tighten the bolts securely.
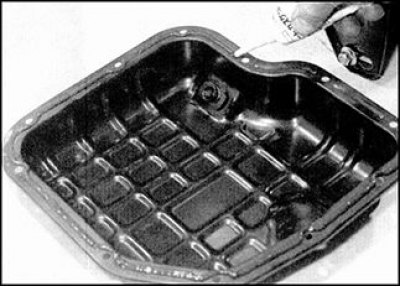
13. Check the cleanliness of the split surface of the small oil pan (stamped steel). Apply a continuous bead of sealant to this surface.
14. Apply sealant to the groove between the holes in the center of the split surface and also around the inner edge of each of the bolt holes.
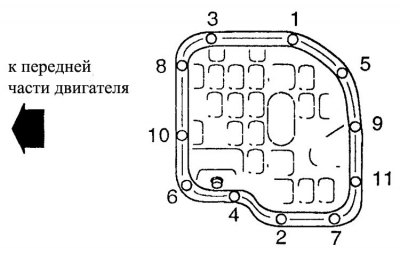
15. Place the pan in place and finger-tighten the bolts. Tighten the bolts in the specified sequence to the specified torque.
16. Install the exhaust pipe (see subsection 6.1.14).
17. Install the bottom shields, tighten the fixing screws.
18. Fill the engine with oil.