2. Install the engine on the stand.
Install in the following sequence.
(1) Remove the drive disk.
Lock the crankshaft with a gear lock (special tool) and using a TORX key (size Q8 E20, commercially available), unscrew the mounting bolts.
You can use the crankshaft pulley lock (special tool).
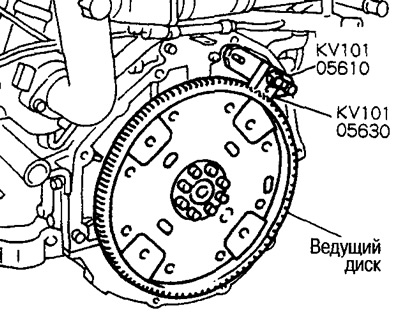
Attention:
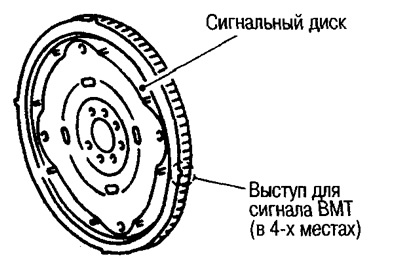
Do not remove the signal disc.
Do not lay the drive disc with the signal disc down.
Do not damage the signal disc (especially 4 areas with protrusions for the TDC signal).
Do not store in places where there is a magnetic field.
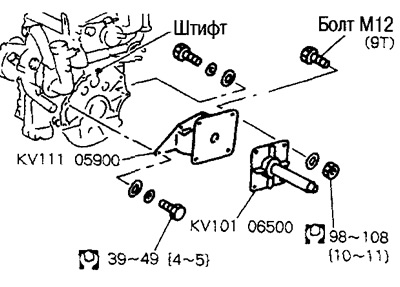
(2) Attach the adapter to the back of the cylinder block (special tool).
Align the cylinder block dowel pin with the pin hole in the adapter.
Note: Mounting bolts (5 pieces.) supplied with an adapter.
(3) Install the fastener (special tool).
Note: Mounting bolts (4 things.) supplied with nozzle.
(4) Lift the engine assembly up and secure it on a stand.
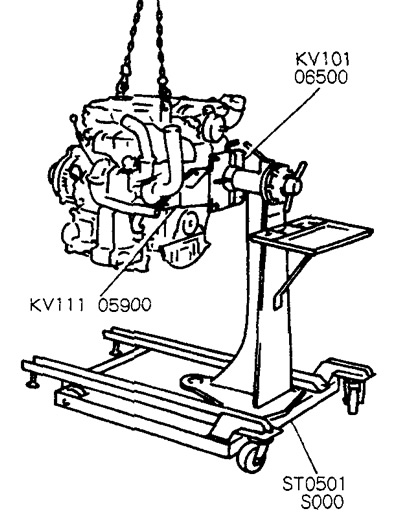
You can first fix the adapter and mounting nozzle on the stand, and then install the engine.
3. Drain the engine oil and coolant from the engine.
4. Next, remove the following parts:
- Exhaust manifold and turbocharger assembly
- High pressure fuel lines
- Intake manifold
- Upper and lower oil pan
- Secondary timing chain
- injection pump
- Primary timing chain
- valve cover
- Fuel injectors assy
- camshafts
- Cylinder head, thermostat, water pipes
- Automatic transmission oil cooler, attachment brackets
5. Remove the injection pump bracket.
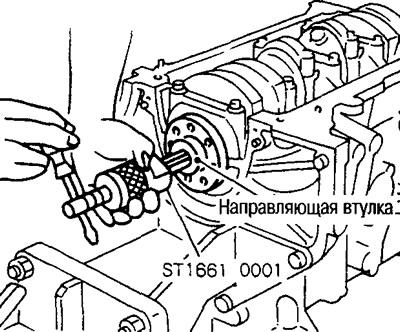
6. If it is necessary to replace the guide sleeve, remove it as follows.
Remove the bushing with a puller (special tool).
7. Remove the rear oil seal retainer.
Insert a screwdriver between the main bearing cap and the rear oil seal retainer.
8. Remove the rear oil seal from the holder.
Pry it out with a screwdriver.
Caution: Be careful not to damage the rear oil seal holder.
9. Remove pistons and connecting rods as an assembly.
(1) Set the piston to be removed to the BDC position.
(2) Remove the connecting rod cover.
(3) Using a hammer handle, push the piston and connecting rod assembly toward the cylinder head.
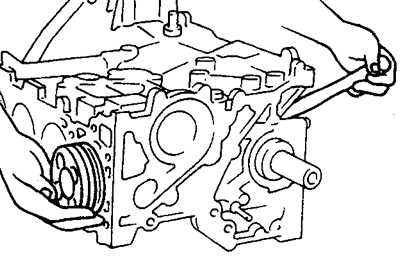
Before loosening the connecting rod nuts, check the side clearance in the connecting rod (see section «Side clearance in the connecting rod»).
10. Remove bearings from a rod and a cover.
Caution: Store the bearings so that they are not mixed up during reassembly.
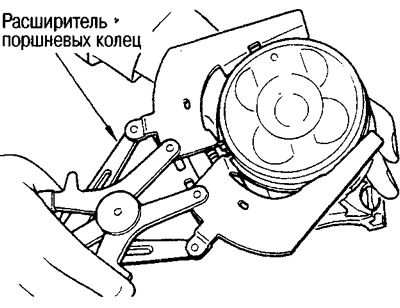
11. Remove the piston rings from the piston.
Use a piston ring expander.
Attention:
- Be careful not to damage the piston when removing the rings.
- Do not break piston rings as a result of excessive expansion.
12. Remove the piston from the connecting rod.
(1) Remove retaining ring with pliers.
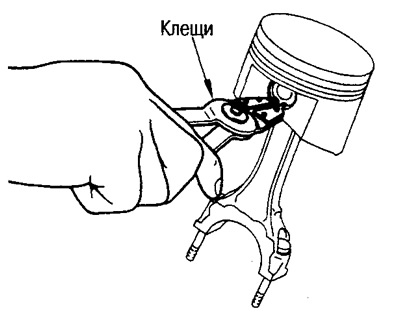
(2) Heat the plunger to 60-70°C, for example with a hair dryer.
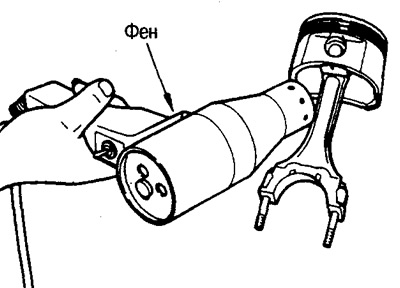
(3) Knock out the piston pin with a rod with a diameter of about 26 mm.
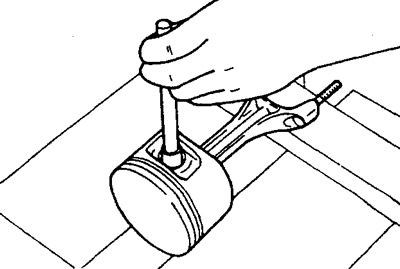
13. Turn away bolts of fastening of radical bearings.
Loosen bolts with Torx wrench (size E-14) several steps in the reverse order shown in the figure.
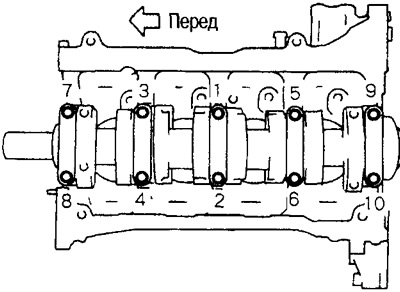
Before loosening the cap bolts, measure the end play of the crankshaft (see section «Axial play of the crankshaft»).
14. Remove the main bearing caps.
To remove the middle covers, use the set screws and loosen the cover.

15. Remove the crankshaft.
16. Remove main bearings from the block of cylinders and covers.
Attention: Remember the mounting locations of the parts and store so as not to confuse.
17. Remove the grease jets.
18. Remove the grease jets relief valve.