Location of lighting and light signaling devices

1. Front position lamp.
2. Front turn signal.
3. Plafonds of general and local lighting (for some vehicle variants).
4. Reading lights - type A (for some vehicle variants).
5. Side turn signal repeater.
6. Headlights.
7. Front fog lights (for some vehicle variants).
8. Luggage compartment light (for some vehicle variants).
9. Central upper brake light.
10. Plafond of general interior lighting (for some vehicle variants).
11. Reading lights - type B (for some vehicle variants).
12. Rear combination lamp.
13. Reverse lamp.
14. Lantern for lighting the registration plate.
15. Rear fog lamp.
16. Plafonds for lighting the legroom (for some vehicle variants).
Lamp Ratings
Outdoor lighting fixtures
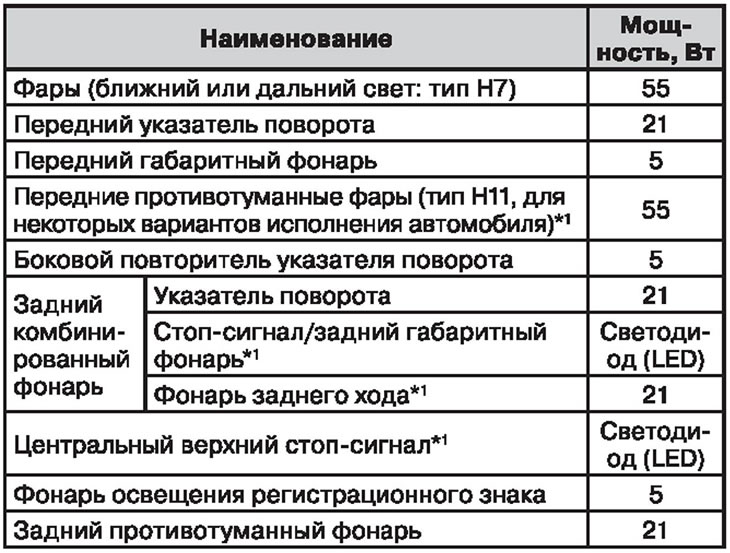
Note. For replacement, contact an Authorized Nissan Dealer.
Ceiling lamps for interior lighting
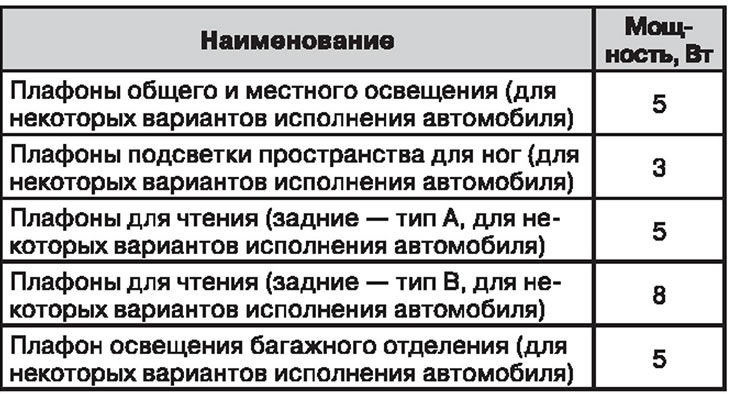
Headlights
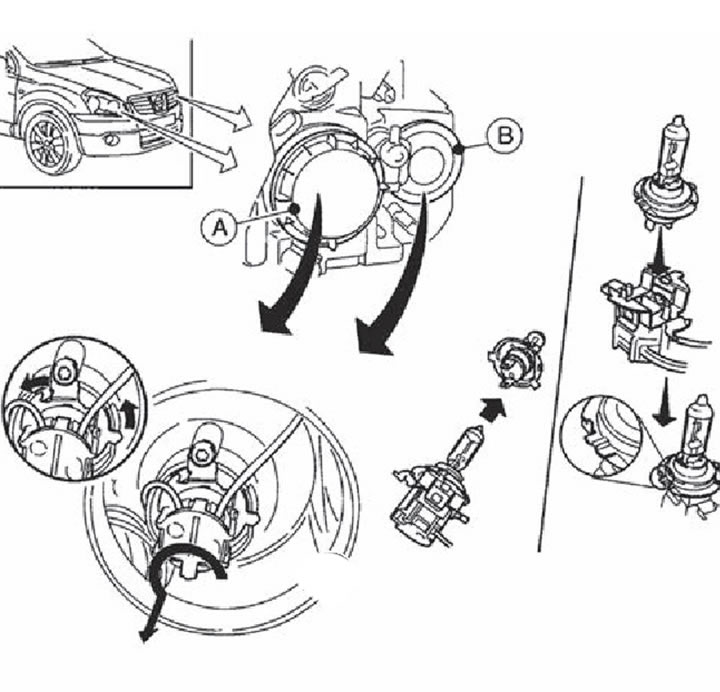
A. Dipped beam. B. Far light.
Xenon low beam headlights (for some vehicle variants)
HID headlights use xenon lamps.
Attention.
- During operation, the xenon headlights are under high voltage. To avoid electric shock, do not modify or disassemble the headlights.
- If the xenon lamp needs to be replaced, contact your authorized Nissan dealer.
Xenon headlight bulb replacement
Attention.
- If you change the xenon headlight bulb yourself, be sure to follow the safety instructions below.
- Due to the high internal pressure of the xenon lamp, be sure to follow the spinning and (wear protective gloves and goggles, use the lamp only in a closed headlight, etc.).
- Do not touch the glass bulb of the lamp with your fingers.
- The lamp is made of high quality quartz glass and is under high pressure. Avoid damage and contamination of the lamp, do not leave fingerprints on it (if they occur, remove with alcohol before installing in the headlight).
- When operating, a xenon lamp produces a certain amount of ultraviolet radiation. To prevent harm to health (burns, eye damage) The xenon lamp must only be used in enclosed headlamps with a UV-absorbing lens.
- To avoid burns, allow the lamp to cool for at least three minutes before handling the lamp
- Since the lamp contains mercury and various salts, its disposal should be carried out by specialized enterprises.
- The lamp may only be used with its intended ballast, which is under very high voltage during operation.
- Do not touch the lamp and wires. Keep a safe distance (not less than 30 mm).
Replacing halogen headlight bulbs
Attention.
- The bulb of a halogen lamp is filled with gas under high pressure. If the bulb is dropped or scratched, the bulb may burst.
- Do not touch the glass bulb of the lamp with your fingers.
- Use bulbs of the same type and wattage as those originally installed in the headlights.
- After replacing the bulbs, it is usually not necessary to check and adjust the beam angle of the headlights. If the headlights need to be adjusted, contact an Authorized Nissan Dealer.
- Do not leave the headlights with the bulbs removed for a long time, as dirt, dust and moisture can penetrate into the headlight housing, which will adversely affect the quality and life of the headlight.
- The headlights use replaceable halogen bulbs. Lamps can be replaced from the engine compartment without dismantling the headlight unit.
1. Open the hood.
2. Disconnect the negative («-») battery cable.
3. Remove the headlight cover.
4. Turn the socket ¼ turn counterclockwise and remove the bulb from the socket.
5. Install the new lamp following the steps described in reverse order. Check that the headlight cover is securely installed.
6. Connect negative («-») cable to the battery and close the hood.
If you are having trouble replacing bulbs, go to an Authorized Nissan Dealer.
Note. After rain or car wash, as well as sudden changes in temperature, condensation may temporarily form on the inner surface of the lenses of outdoor lighting devices. This is caused by the difference between the temperature inside the appliance and the outside temperature. This is not a malfunction. If large drops of water condense on the inside of the lenses, have a Nissan dealer repair them.
Lamp Replacement Procedures
Removal / installation
In the rest of the lighting and signaling devices, four types of lamps are used, which are indicated by the letters of the Latin alphabet: A, B, C and D.
To replace the lamp, first remove the diffuser and/or lamp housing.
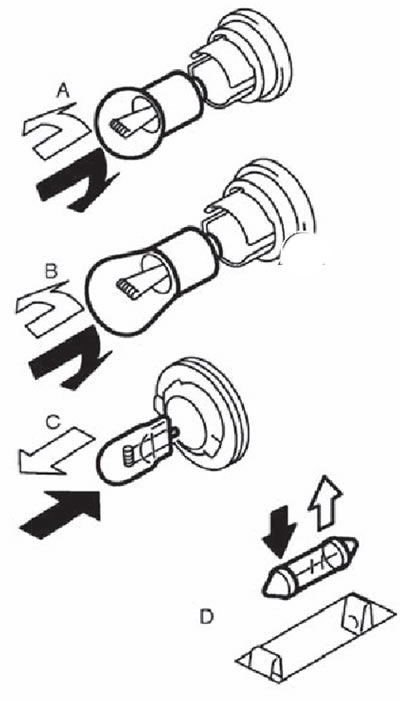
Note. The white arrow shows the direction of removal of the lamp, with the black one - installation.
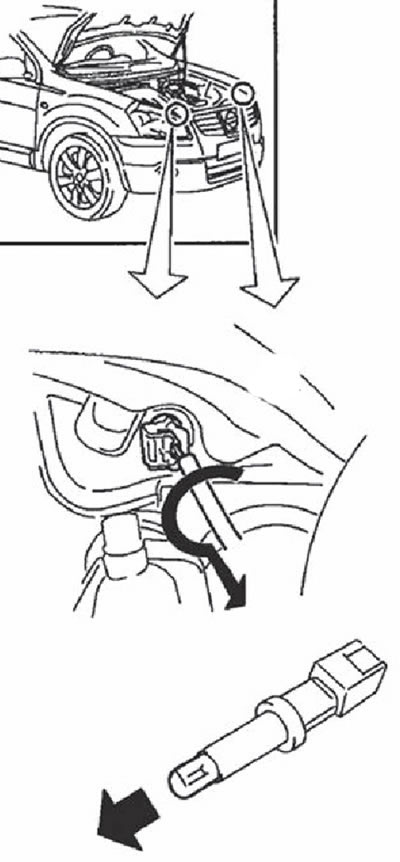
Front position lamp
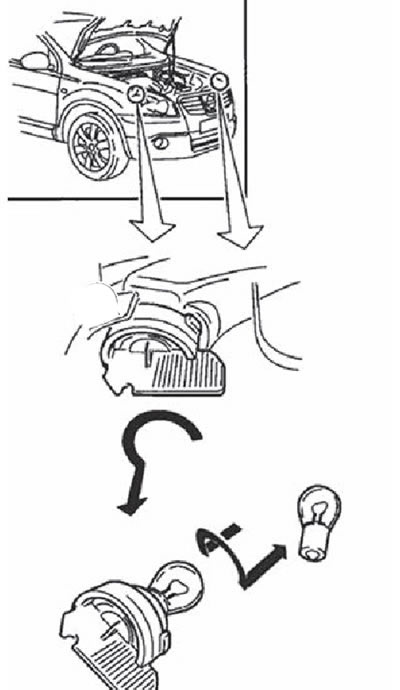
Front turn signal
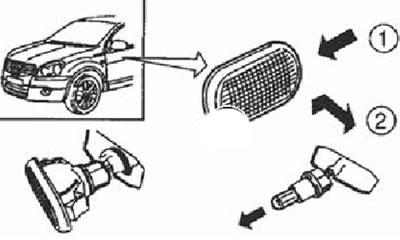
Side turn signal repeater
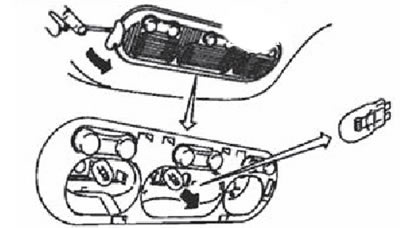
Plafonds of general and local lighting (for some vehicle variants)

Reading lights (rear) - type A (for some versions of the car / rear general interior lighting (for some vehicle variants)
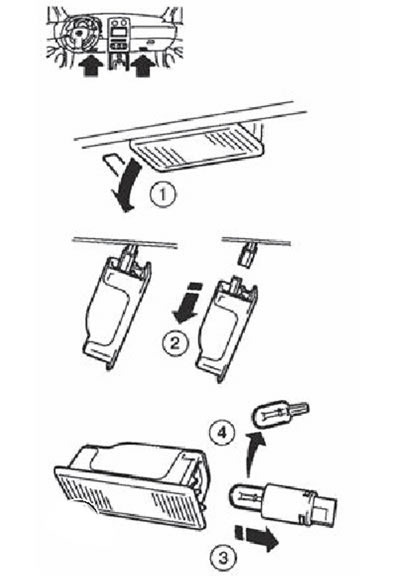
Footwell lights (for some vehicle variants)
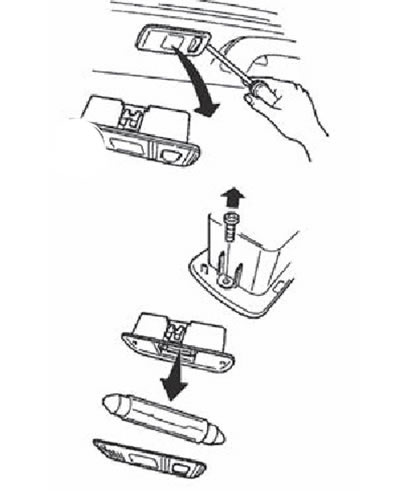
Reading lights (rear) - type B (for some vehicle variants)
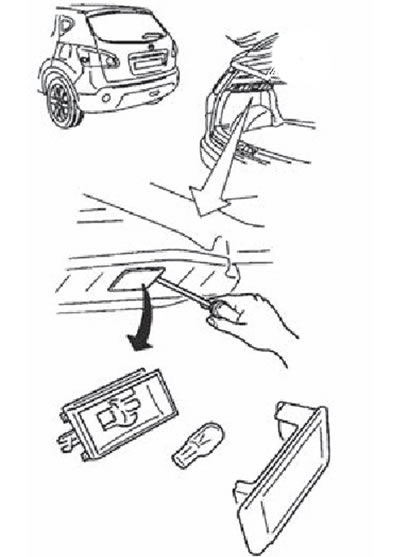
Luggage compartment light
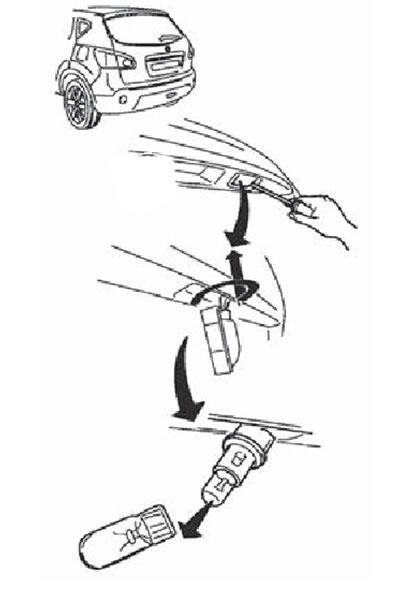
Registration plate light
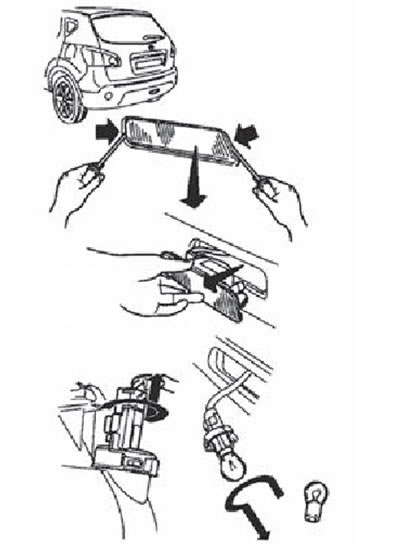
Rear fog lamp
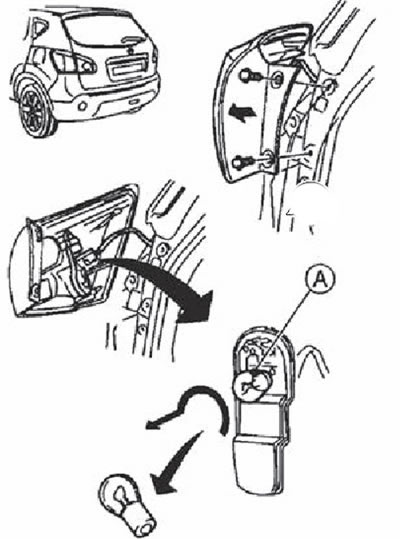
Rear combination lamp (A - turn signal lamp)