Attention.
- Nissan recommends using only Genuine Nissan Tire Repair Sealant that your vehicle is equipped with. The use of other sealants may damage the tire air valve seal, causing air to escape from the tire.
- Do not use the temporary tire repair kit that your vehicle is equipped with to repair tires of other vehicles.
- Do not use the Temporary Tire Repair Kit for purposes other than repairing, inflating and checking tire pressure.
- Connect the tire inflation compressor to 12V DC only.
- Keep water and dust out of the temporary tire repair kit.
- Do not disassemble or modify the temporary tire repair kit.
- Do not galvanize a kit to temporarily repair a damaged wheel.
- Do not use the tire repair kit in the following cases. Contact an authorized Nissan dealer to carry out the necessary repairs.
- If the sealant has expired (indicated on the label of the sealant bottle).
- If the size of the damage exceeds 6 mm.
- If the sidewall of the tire is damaged.
- If you continued to drive after a tire failure, resulting in a significant decrease in air pressure in the tire.
- If the tire has completely come off the wheel rim in or out.
- If the wheel rim is damaged.
- If two or more wheels are damaged.
Using the Temporary Tire Repair Kit
Remove the temporary tire repair kit from the luggage compartment.

1. Container with sealant. 2. Air compressor. 3. Speed limit warning sticker.
Note. If the vehicle is equipped with a temporary tire repair kit, it is not equipped with a spare wheel, jack and tool kit. These tools can be purchased separately from an authorized dealer. To purchase this equipment, contact an authorized Nissan dealer.
Before using the temporary tire repair kit
- If a foreign object is stuck in the tire (e.g. nail or screw), do not take it out.
- Check the sealant expiration date on the label on the sealant container. Do not use sealant if the expiration date has passed.
Tire repair
1. Shake the container of sealant thoroughly.

2. Remove the sealant bottle cap and the orange cap from the air compressor.
3. Screw a can of sealant into the compressor port (which was covered with an orange lid).
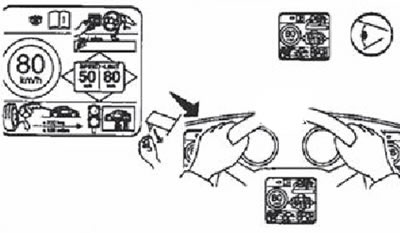
4. Affix a speed limit warning label in a location visible to the driver.

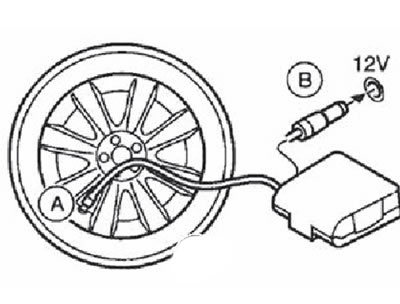
5. Connect the compressor hose securely to the tire air valve (A).

6. Plug the compressor into the car's electrical outlet (IN).
7. Turn the ignition switch to position «ACC».
8. Turn on the compressor and inflate the tire to the pressure indicated on the plate located on the middle pillar of the body on the driver's side.
Attention. Do not run the compressor for more than 10 minutes.
If you are unable to inflate the tire to the correct pressure within 10 minutes, the tire is too badly damaged and cannot be repaired with a temporary tire repair kit. Contact an authorized Nissan dealer.
9. Disconnect the compressor hose from the tire valve. Immediately start driving the car at a speed of no more than 80 km/h.
10. After 10 minutes or after driving 5 km, stop and check the air pressure in the tire. If the air pressure in the tire has not decreased, the repair has been done well.
If pressure is lower than labeled, repeat procedure from step 5.
If the tire pressure drops below 130 kPa again, this means that the damage cannot be repaired with a temporary tire repair kit. Contact an authorized Nissan dealer.
Attention.
- Do not reuse the sealant bottle and compressor hose.
- To purchase a new bottle of sealant and compressor hose, contact an Authorized Nissan Dealer.
After tire repair
Go to an Authorized Nissan Dealer or an authorized tire repair shop as soon as possible to have the damaged wheel professionally repaired or replaced.