2. Clamp the axle shaft in a vise through the soft gasket.
3. Carefully knock off the axle shaft flange on the differential side and release the pivot housing plug (photo).
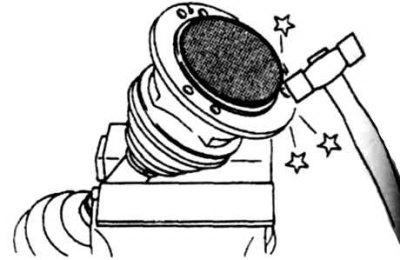
4.3 Dismantling the inner joint
4. Remove the clamps of the covers (photo).
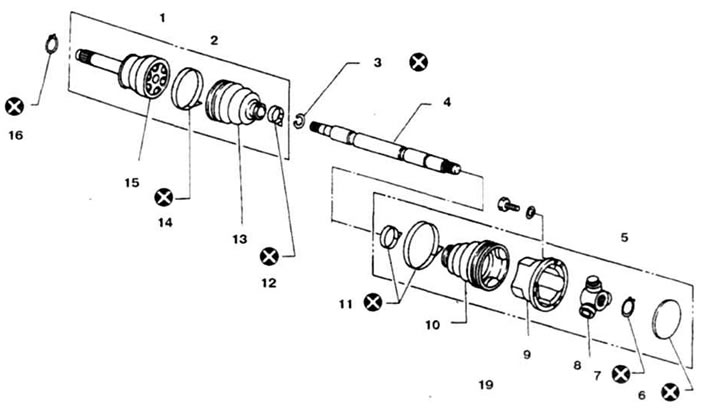
4.4 Parts of the half shaft
1. Wheel side; 2. Details of CV joint type Rzeppa; 3, 7, 16. Retaining ring; 4. Shaft; 5. Tripod hinge ("sliding" hinge); 6. Plug; 8. Crosspiece; 9. Body; 10, 13. Case; 11, 12, 14. Collar; 15. Hinge; 17. The ring is selected according to the thickness
5. Move the boots and sliding joint housing towards the wheel trunnion.
6. Mark the position of the cross on the axle shaft.
7. Press the half shaft out of the cross (performed on the press).
8. Remove the cover and housing.
9. Mark the position on the axle shaft and carefully knock out the outer CV joint (photo), remove the retaining ring.
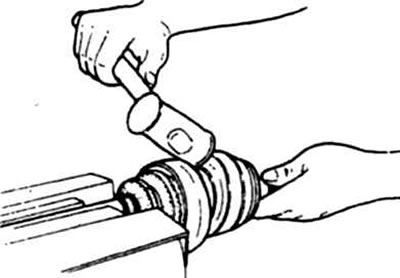
4.9 Removing the outer CV joint from the axle shaft
10. Wash and inspect all parts.
11. Before assembly, put grease in the outer CV joint.
12. Dress a cover on a half shaft and establish a new lock ring. Lay grease in the outer CV joint and secure the boot with clamps.
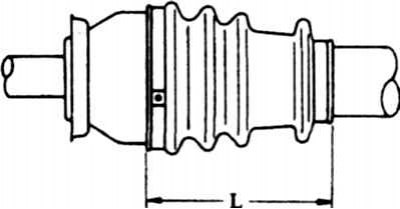
4.12 When installing the cover, keep the size L
13. Put on the cover on the axle shaft from the side of the differential, clamps and install the body of the inner CV joint.
14. Clamp the shaft in a vise and install the cross so that the serrated collar of the cross is facing the side of the shaft.
Attention! If a removed cross is installed, then align the marks made during disassembly. If a new cross is installed, then move the cross in the direction of the trunnion to the limit.
15. Fix the cross on the shaft by riveting the notched collar in two places (photo). Depth of a riveting not less than 1 mm.
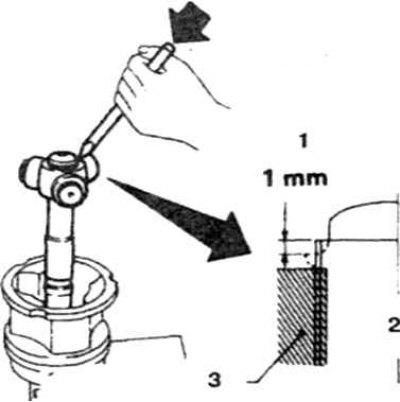
4.15 Fixing the cross of the sliding CV joint on the axle shaft
1. Not less than 1 mm
16. Put on the body and put grease in the inner CV joint
17. Secure the cover with a new collar.
18. Lubricate the plug gland and install the plug, install the three bolts and nut. Press in the plug, hit in three places.
19. Set the size L of the cover (photo) and flatten the cover, removing residual pressure. Secure with a small clamp.