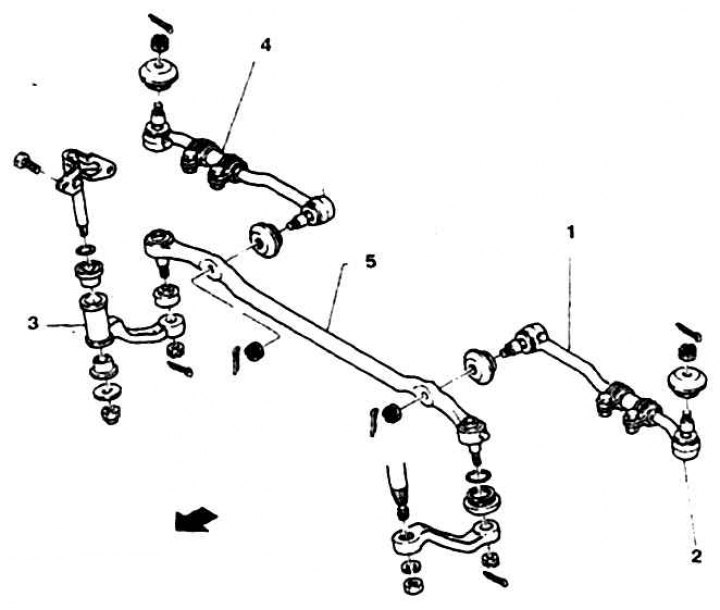
20.1 Tie rods
1. Internal tip; 2. Outer tip; 3. Pendulum lever; 4. Adjusting collar; 5. Traverse
2. All tie rods can be removed complete with swingarm and bipod. After dismantling the rods, the wheel alignment angles should be checked. Finally tighten the nuts of the tips after lowering the car.
Side traction
3. Unpin and unscrew the nuts (photo).
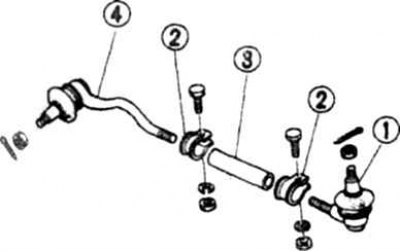
20.3 Parts of the lateral link
1. Outer tip; 2. Collar; 3. Threaded sleeve; 4. Inner tip
4. Press out the pins of the tie rod ends with a special puller (photo) and get traction.
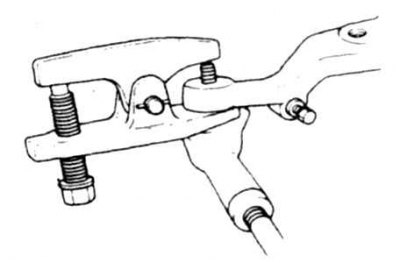
20.4 Pressing out the finger of the handpiece
5. Check the play in the ball pins, replace the pins if necessary.
6. If necessary, disassemble the rods, for which mark the position of the tips in the sleeve, unscrew the bolts of the clamps and unscrew both tips.
7. Assembly and installation are carried out in the reverse order. If removed tips are installed, then align the marks made before disassembly. If new rods are installed, then set the dimension A according to the removed rods (photo). After assembly, check and adjust the wheel alignment.
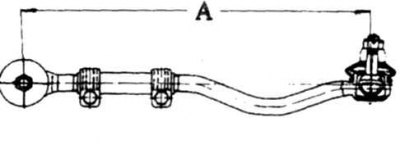
20.7 Dimension A to be set on new rods
Pendulum lever
8. Play in the pendulum lever is eliminated by installing new bushings.
9. Turn away bolts of fastening of an arm of the lever to a frame (photo).
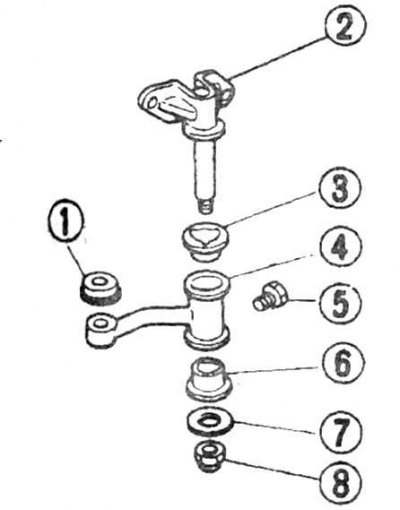
20.9 Parts of the pendulum arm
1. Case; 2. Bracket; 3, 6. Sleeve; 4. Mzyatnikovy lever; 5. Oiler plug; 7. Washer; 8. Nut
10. Unpin and unscrew the nut, press the pin of the pendulum lever out of the transverse link (photo).
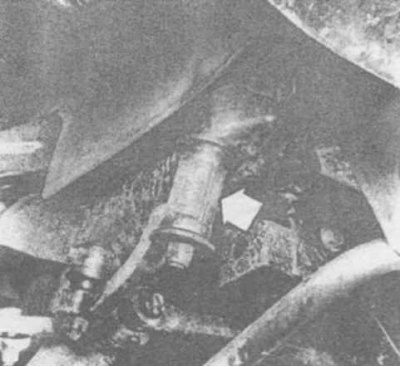
20.10 Pendulum lever
11. If you need to replace the bushings, then unscrew the nut, remove the washer and remove the lever from the bracket, remove the bushings. Replace the bushings and assemble the lever.
12. Installation is carried out in the reverse order. Tighten all nuts to the specified torque.
Transverse link
13. Unsplint and turn away all nuts of cross-section draft.
14. Vypressuyte fingers and get draft.
15. Check up a condition of plugs of draft, if necessary replace.
16. Installation is carried out in the reverse order.
Steering rods, assy
17. Unscrew the bipod nut and press the bipod off the gearbox shaft.
18. Turn away bolts and remove the pendulum lever.
19. Unsplint and turn away nuts of lateral drafts on rotary fists, press out fingers.
20. Remove all rods.
21. Installation is carried out in the reverse order.