Note. Broken valve springs and worn valve stem seals can be replaced without dismantling the cylinder heads. You only need two special tools and a source of compressed air. Before starting work, make sure that you have a tool powerful enough to compress the stiff valve springs used to complete the engines of the car models in question.
1. Remove the top section of the inlet pipeline (see Section Removal and installation of the inlet pipeline) and cover (And) heads (OK) cylinders (see Section Removal and installation of covers of heads of cylinders).
2. Remove the timing chain (see Section Removing, checking the condition and installing the timing chain and sprockets). Remove camshafts and valve lifters (see Section Removal and installation of camshafts and valve lifters).
3. Remove the spark plugs from the cylinders whose components need to be checked. If there is a need to replace the valve stem seals, remove all spark plugs.
4. After turning the crankshaft, bring the corresponding piston to the TDC position of the end of the compression stroke (see Section Bringing the piston of the first cylinder to the top dead center position (TDC)). When replacing valve stem seals, start with the first cylinder, then move from one to the next in ignition order (see specs).
5. Screw a long adapter nozzle into the spark plug hole of the corresponding cylinder and connect a hose from a compressed air source to it.
Note. Due to the fact that the guide tubes of the candles are quite long, a special adapter will be required to connect the compressed air source. Special attachments are available with a quick connect connector - ask at car accessories stores.
6. Supply air to the cylinder.
Attention! Under air pressure, the piston can move down, which will lead to a sudden rotation of the crankshaft - do not leave the socket wrench on the bolt screwed into the shaft trunnion, with which the piston was brought to the TDC position. The valves will be held in place by air pressure.
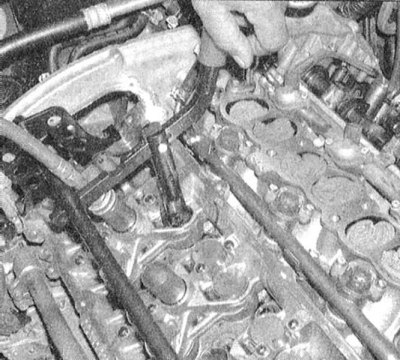
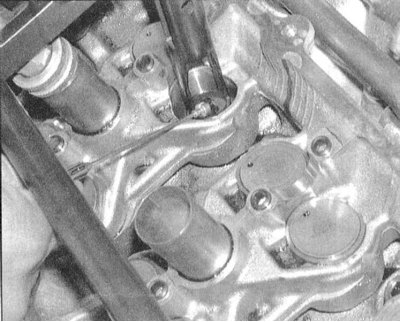
7. To prevent debris and other foreign objects from entering the engine, plug all openings in the block around the valves to be serviced with rags. Now, using a special tool, compress the spring of the serviced valve. Using tweezers or a magnetized rod, remove the crackers of the split lock from the grooves on the valve stem.
Note. If it is not possible to fix the valve in the closed position with compressed air, therefore, there is a leakage, determined by the presence of mechanical defects in the working chamfer of the valve disc or its seat. In this case, the cylinder head must be removed from the engine in order to carry out the appropriate reconditioning.
 |  |
8. Remove the spring plate and the spring itself from the valve stem, then remove the oil slinger cap from the guide sleeve.
9. Attach a rubber band to the upper end of the valve stem, or wrap tape to prevent the valve from falling into the combustion chamber, then shut off the air supply to the cylinder.
10. Check the valve stem for signs of wear or mechanical damage. Rotating the valve inside the guide sleeve, evaluate the value of the radial play of its end, which determines the degree of straightness of the rod (bent valve to be replaced).
11. Move the valve up and down in the guide sleeve, trying to identify the jamming points, the presence of which indicates either deformation of the valve stem or damage to the sleeve - in any case, the head must be removed in order to perform the necessary reconditioning.
12. Re-inject air into the cylinder to secure the valve. Remove the rubber bandage/adhesive tape from the rod.

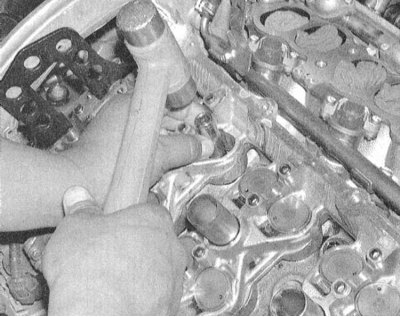
13. Lubricate the valve stem with clean engine oil and install a new oil seal.
Note. Special mandrels are available for fitting caps on bushings, however, in this case, a deep socket of the appropriate size is also perfect. The cap is tapped with a hammer through the mandrel.
14. Put the valve spring on the valve stem (end with a shortened pitch of turns to the head).
15. Place a plate on the spring, then compress the spring with a special tool and carefully fill the split lock crackers into the seat groove on the valve stem. To temporarily fix the crackers before releasing the tool, lubricate them from the inside with a thick lubricant.
16. Watching for the correct fit of the crackers in the groove, release the spring compressor.
17. Shut off the air supply to the cylinder and unscrew the adapter from the spark plug hole.
18. Reinstall the camshafts and valve lifters (see Section Removal and installation of camshafts and valve lifters). Install the timing chain (see Section Removing, checking the condition and installing the timing chain and sprockets).
19. Install the cylinder head cover (see Section Removal and installation of covers of heads of cylinders).
20. Replace the spark plugs, coils and top section of the intake manifold (see the relevant Sections of this Part of this Chapter).
21. Start the engine and check for signs of oil leaks and unusual valve train noises.